
How I got customized personal emails, a domain, and a website for 11 dollars a year
The following post contains a bunch of specific details on how I managed to get free custom domain emails and a website on the internet with my only ongoing cost being the domain name.
Our goals
- Maintenance burden should be 0- if I do absolutely nothing to maintain this, everything should continue to Just Work™
- Everything must be free, or as close to 0 as humanly possible
- Optimizations and extensions should be simple, easy, and intuitive
Constraints
- I do want the ability to have the site versioned, so if I ever need to, I can revert back to an older version of a site easily
- I do want my content to be automatically optimized, so it can be shared correctly on Facebook and show up as a rich snippet on Google
- I do want solving for scale to be trivial, ideally in a way where it’s simple to add in the ability to deal with theoretical spikes in traffic
- I do want custom domain emails, so I can send and receive emails from [email protected] in Gmail without having to think about it
As everybody knows, your solution to a problem is informed just as equally by what you’re not solving for, as much as it is the problem itself.
- I don’t need full CMS capabilities, or the ability to have dynamic backend functionality for my online presence (though if I do in the future I’d like for it to be easy to add in)
- I don’t need commerce or shopping capabilities
- I don’t want to have to muck about and style my site from the ground up- using and customizing a pre-built theme is a hard requirement, but CSS hurts my very smooth brain
The chosen tech stack
| Service | Company | Cost Per Annum |
|---|---|---|
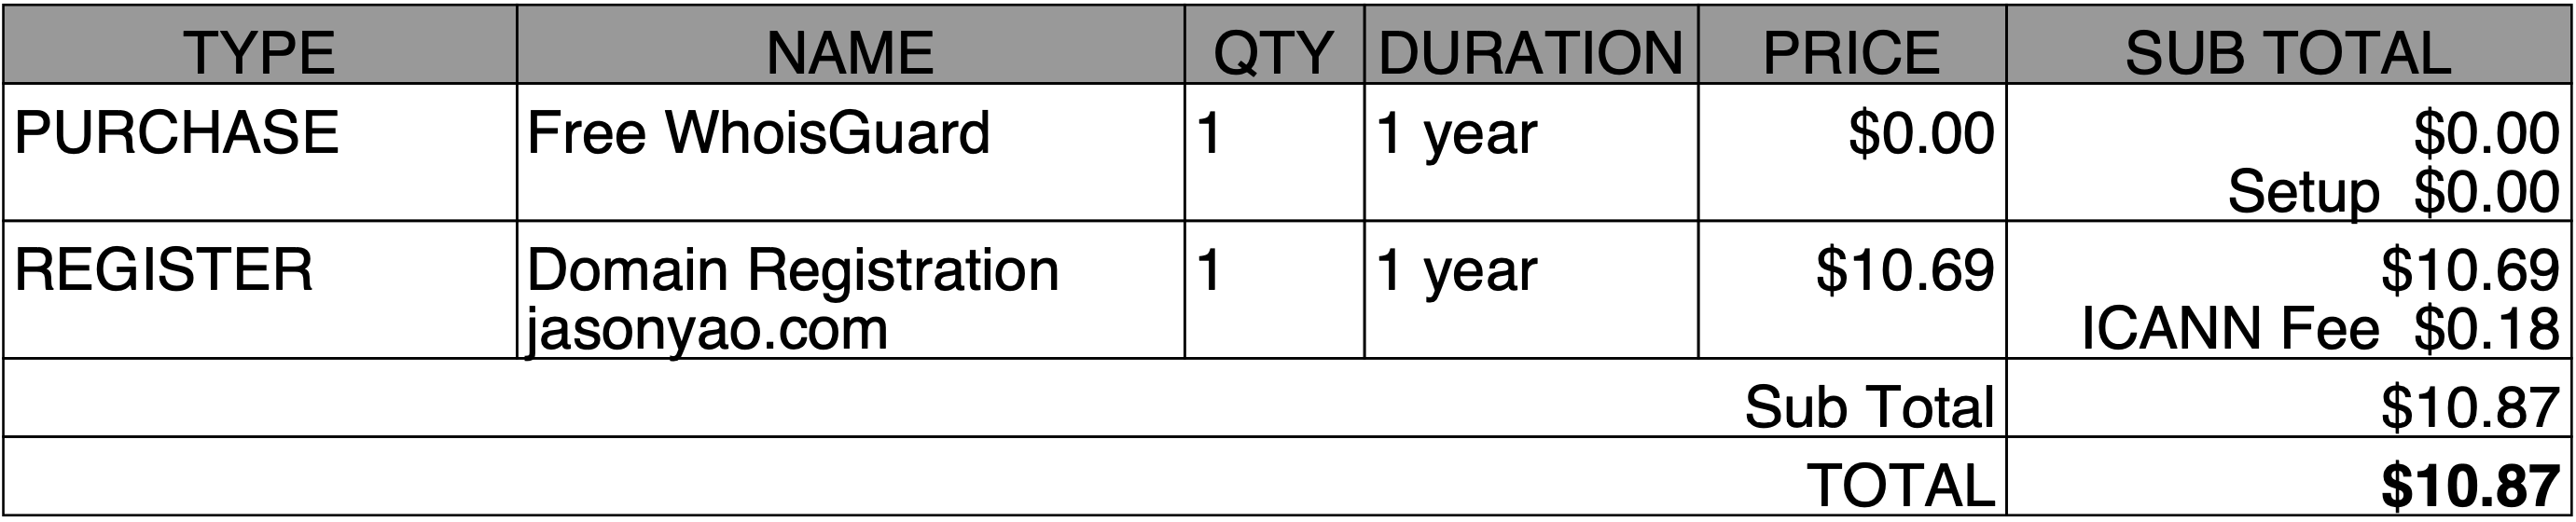
| Custom domain | Namecheap | $10.86 USD |
| Custom domain email | Mailgun | $0.00 USD |
| Website hosting & Continuous Deployment (CD) | Github Pages | $0.00 USD |
| Continuous Integration (CI) | TravisCI | $0.00 USD |
| Static site generator | Jekyll | $0.00 USD |
| Content Delivery Network (CDN) | Cloudflare | $0.00 USD |
Total cost per year: $10.86 USD
Current Time Spent on Maintenance: 0 hours
Here’s what the network request looks like from a user
Your standard CDN-fronted, static site solution
The thing to note here is that there’s nothing backing the webhost here- there’s no database or microservice backing it up, since the entire website is statically created at build time, and simply uses Github Pages to serve its content.
To actually update the content, the developer user flow looks like this
(note that everything in this diagram is automated after pushing to Github):
(Ab)using Github by using source control for full site deployments (and rollbacks if necessary)
This setup comes with some nice benefits:
- There’s no server or services that I need to manage
- Scaling horizontally is as simple as fronting the static content with 1 or more CDN or any other edge server
- Things are fast since everything is pre-computed, and the only bottleneck to painting content for users is literally just the network.
- Development cycle for new content is trivial, since it’s just “fire and forget” (or in this case “push and forget”).
Setup guide
Getting a domain
This is as simple as just going to Namecheap, searching for a domain, and then hitting the buy button.
NOTE: Since the domain cost is the only ongoing cost with this build, you may be tempted to take up namecheap’s great deal with paying $1.00 USD the first year for a .xyz TLD.
DO NOT FALL FOR THIS.
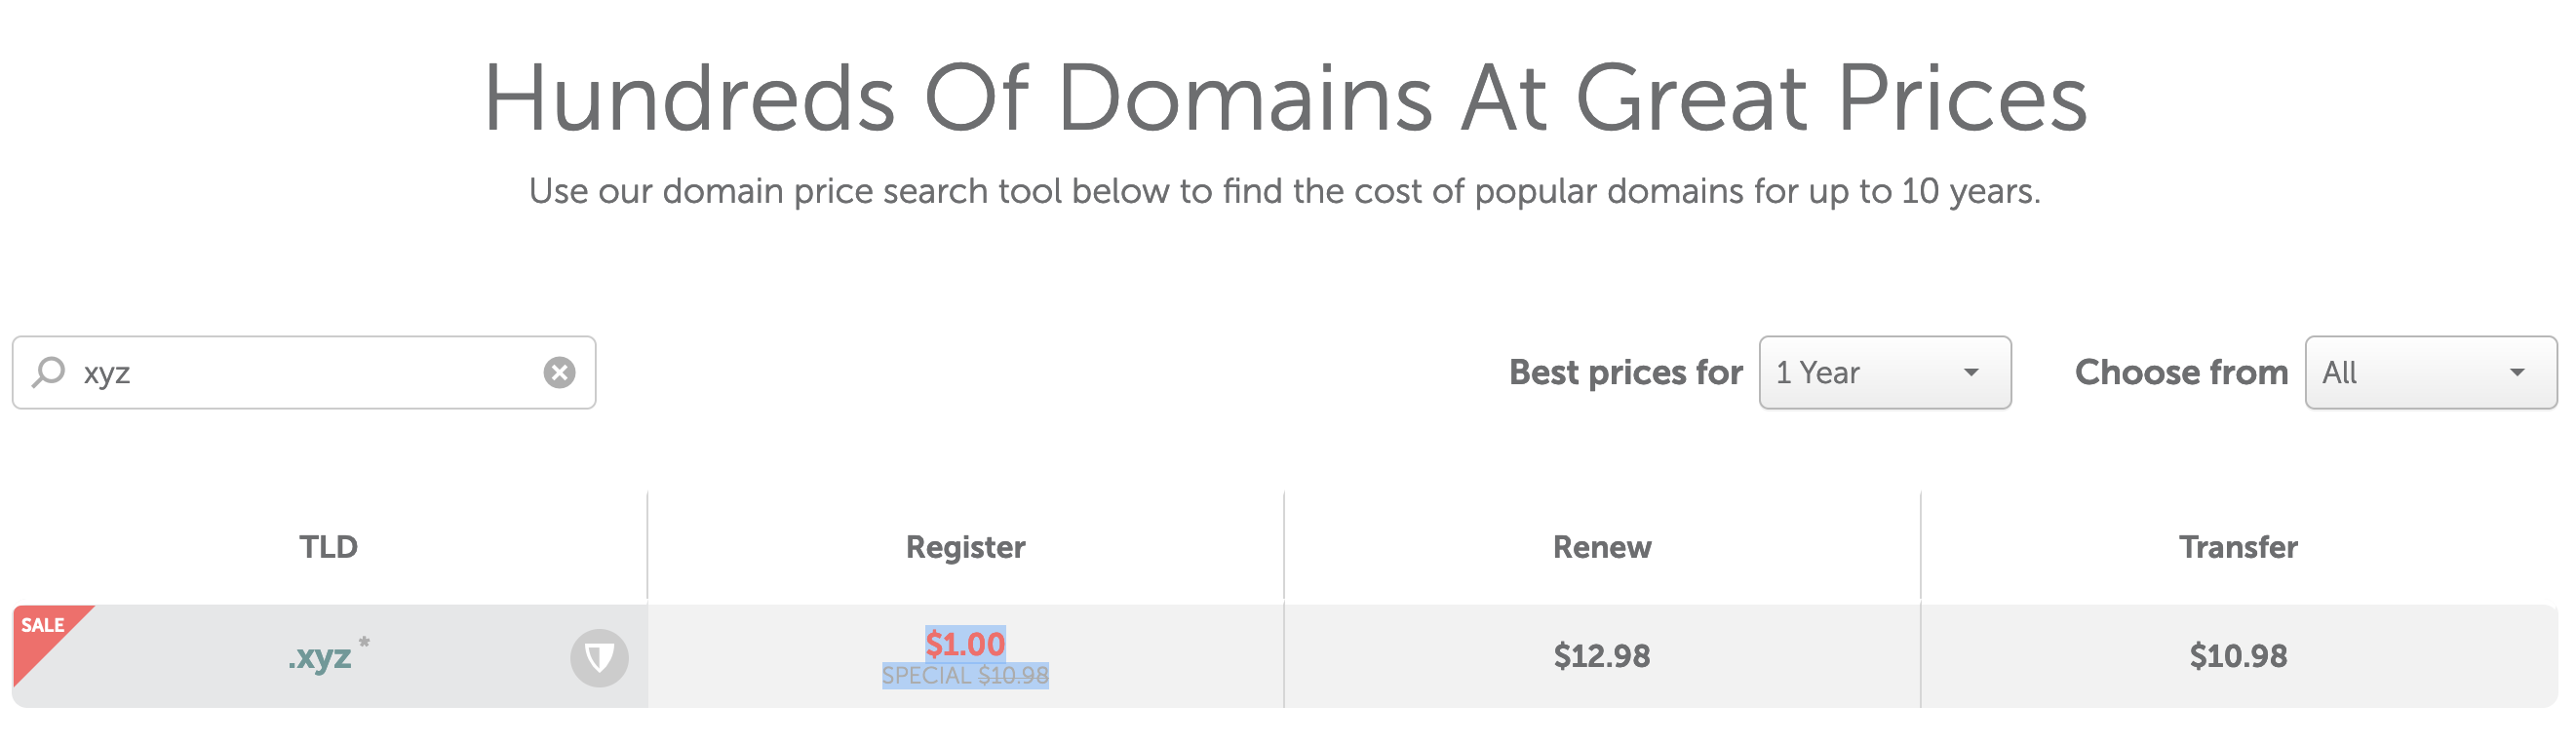
Remember kids, the first hit is free- or in this case 1 dollar, but it's the follow-up where they get you.
The annual renew rate for these cheap .xyz TLDs is actually around $13 USD, meaning that you’d be paying over a 40% premium for a more sketchy-looking domain name compared to a regular old .com or .net TLD.
I’d suggest just getting a regular .com/.net, or one of the cheaper annual cost ccTLDs, depending on which country you’re from.
Getting free custom email sending/receiving through Gmail
This one takes a little bit of setup. Let’s dig in.
2021 April 1st editor’s note: The process laid out here is no longer valid for new users due to changes to Mailgun’s pricing of their free tier. Consider other programmatic mail providers that have a free tier instead
Danny Guo wrote up a great walkthough on this process back in 2018, but the gist is:
- Use any programmatic email provider with a free tier that enables the creation of SMTP users
- Enable email receiving by adding in an email route to forward emails to your personal Gmail account
- Enable email sending by creating an SMTP user [email protected], and then give Gmail the username & password of your SMTP user so they can send emails that appear with an origin email of [email protected]
Mailgun’s free tier in particular is really nice, since I get access to 10,000 emails a month for free- do note that this 10k number includes both sending and receiving!
Generally I’ll be in the ~200 emails sent & received every month, so I’m well within the established limits here.
Setting up website hosting
This is the meat of our new website that we’re making
Our overarching steps here will be:
- Create a new repo
- Setup our static site generator
- Setup our CI/CD pipeline
- Configure Github Pages to deploy our generated static website
Creating a new repo
- This should be straight-forward, with the only caveat being
that you’ll need to be particular about your repo naming
convention, and make your name
<USER_NAME_HERE>.github.ioas the repo name
Setting up our static site generator
- We use Jekyll here as our static site generator, and use a modified Jekyll theme as our starting off point for our website
Setting up our CI/CD pipeline
Our CI/CD pipeline is going to be a bit special. We’re going to:
- Set our mainline branch to be
source, and branch off/merge in content into this branch - Create a new branch off of
sourcecalledpublish, and use this branch as the branch where we have our generated site created in and kept in source code - Create a
travis.ymlfile that will “deploy” our code when it detects a push to thesourcebranch, which will build the site and move all built files into thedocs/directory on thepublishbranch, before pushing everything up
Configuring GitHub Pages to automatically deploy our site
- Let’s go ahead and in our created repo hit the
Settingstab
- Once here, let’s enable GitHub Pages, and point it to
our deployment branch that we’re committing to
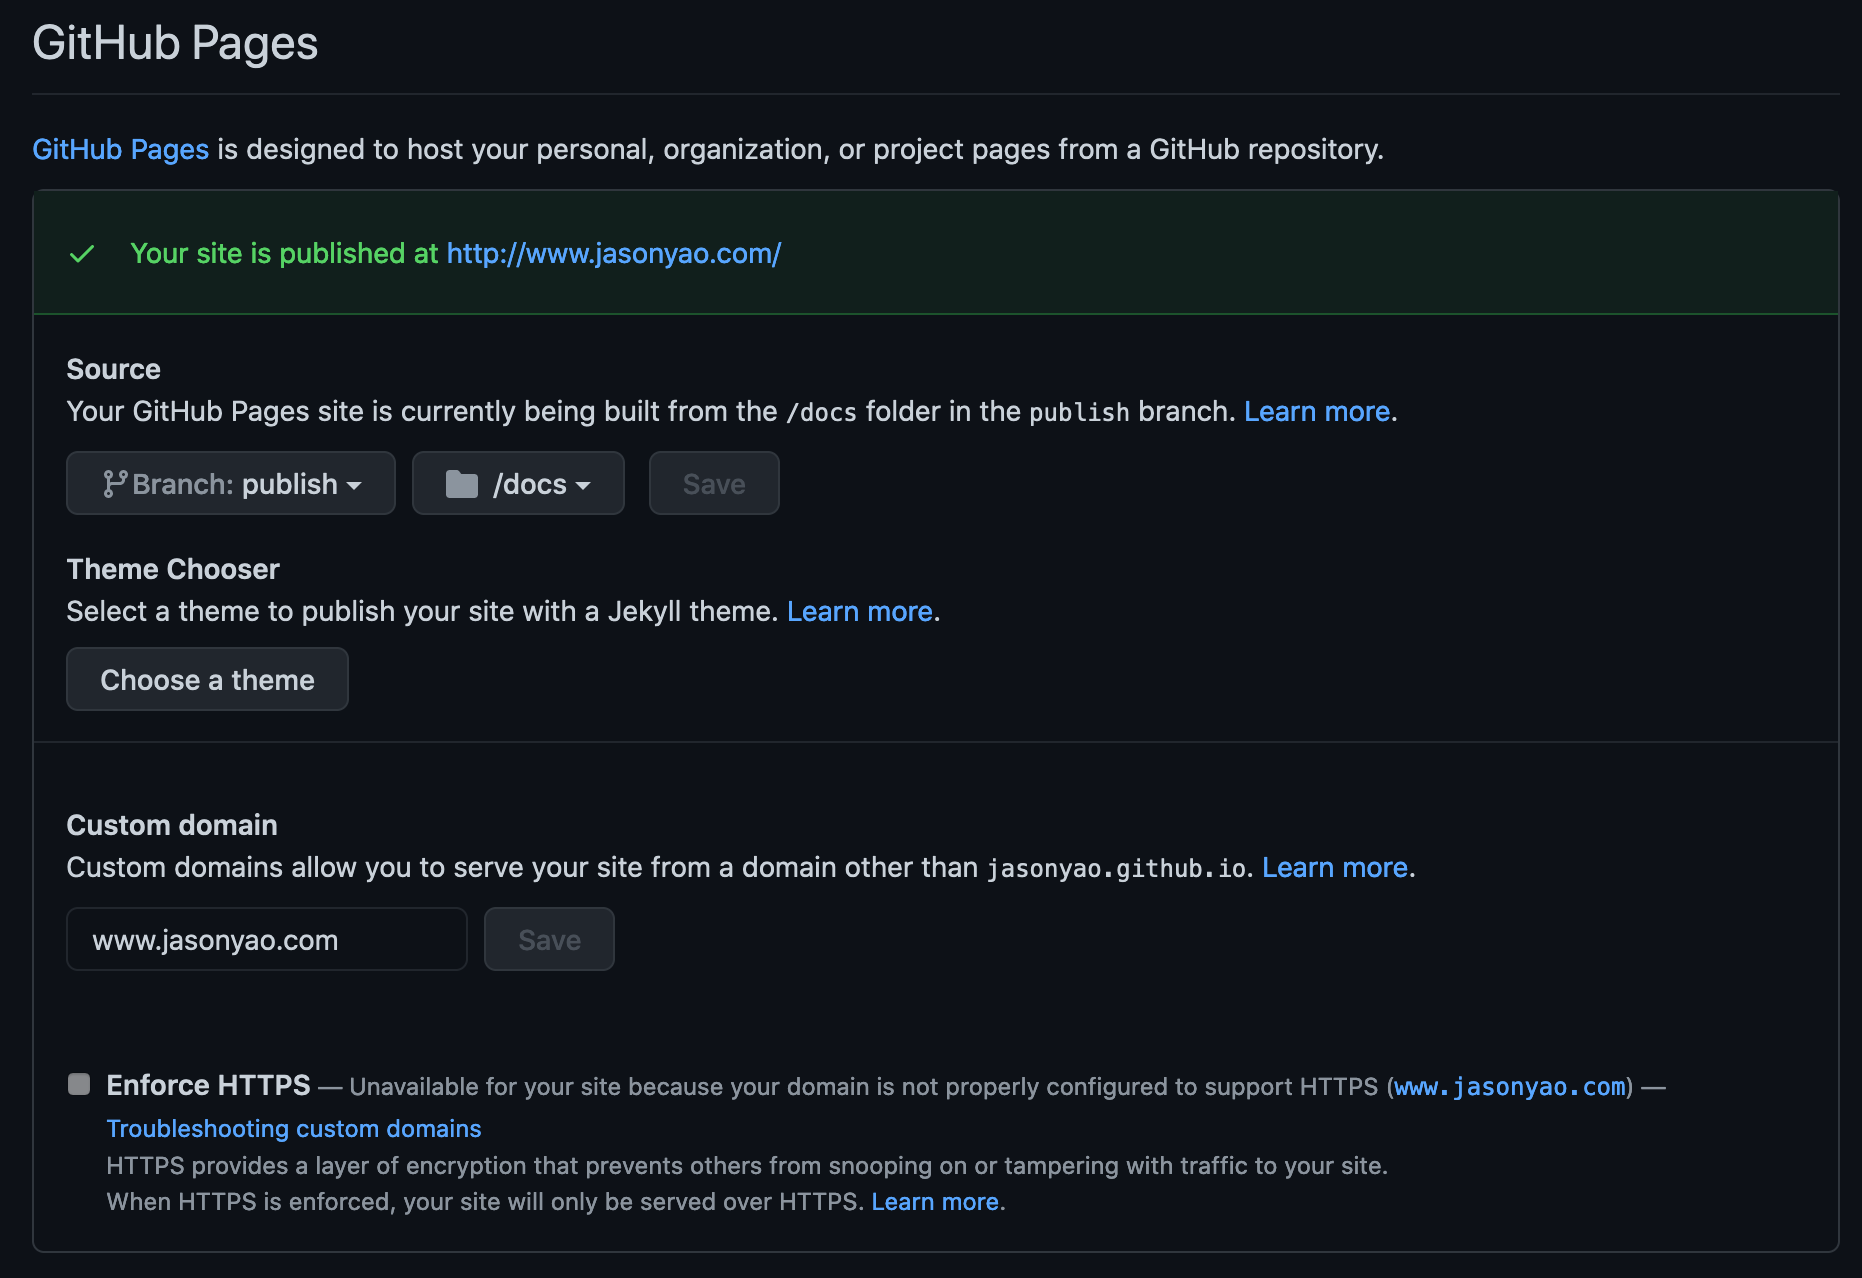
- And we’re done! Now, any time anything new is committed to the
publishbranch in thedocsdirectory, GitHub Pages will take those files and publish it onto the internet for us!
Enabling horizontal scaling through CDNs
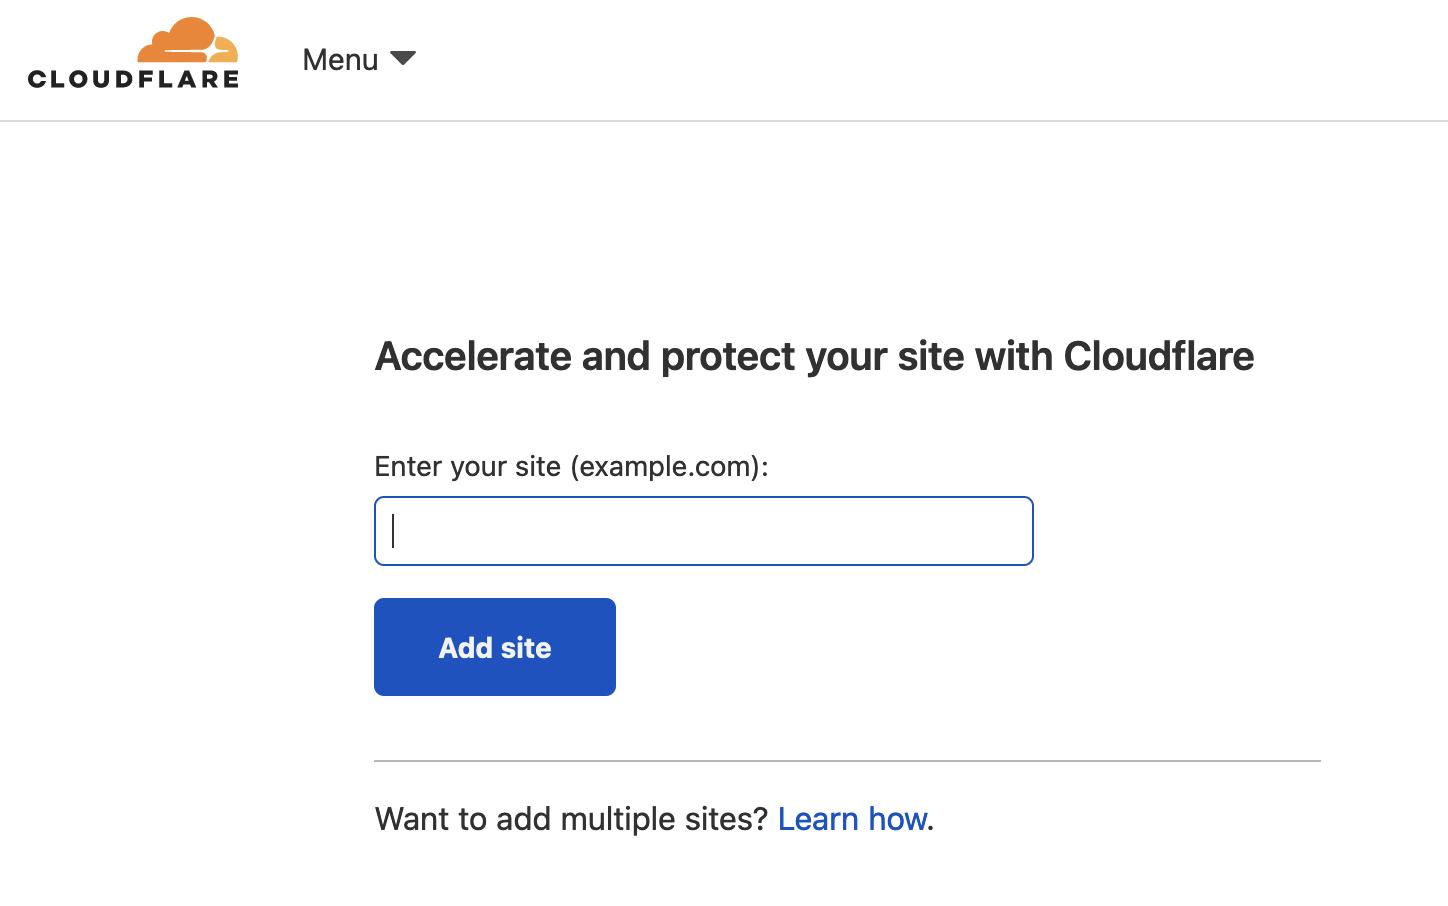
We’re going to use Cloudflare as our chosen CDN because I love their ease-of-use and how consumer-friendly they are as a company.
Create a Cloudflare account if you don’t have one already, which should pop you into the dashboard over at https://dash.cloudflare.com

Add in the name of your site that you want to have served by Cloudflare
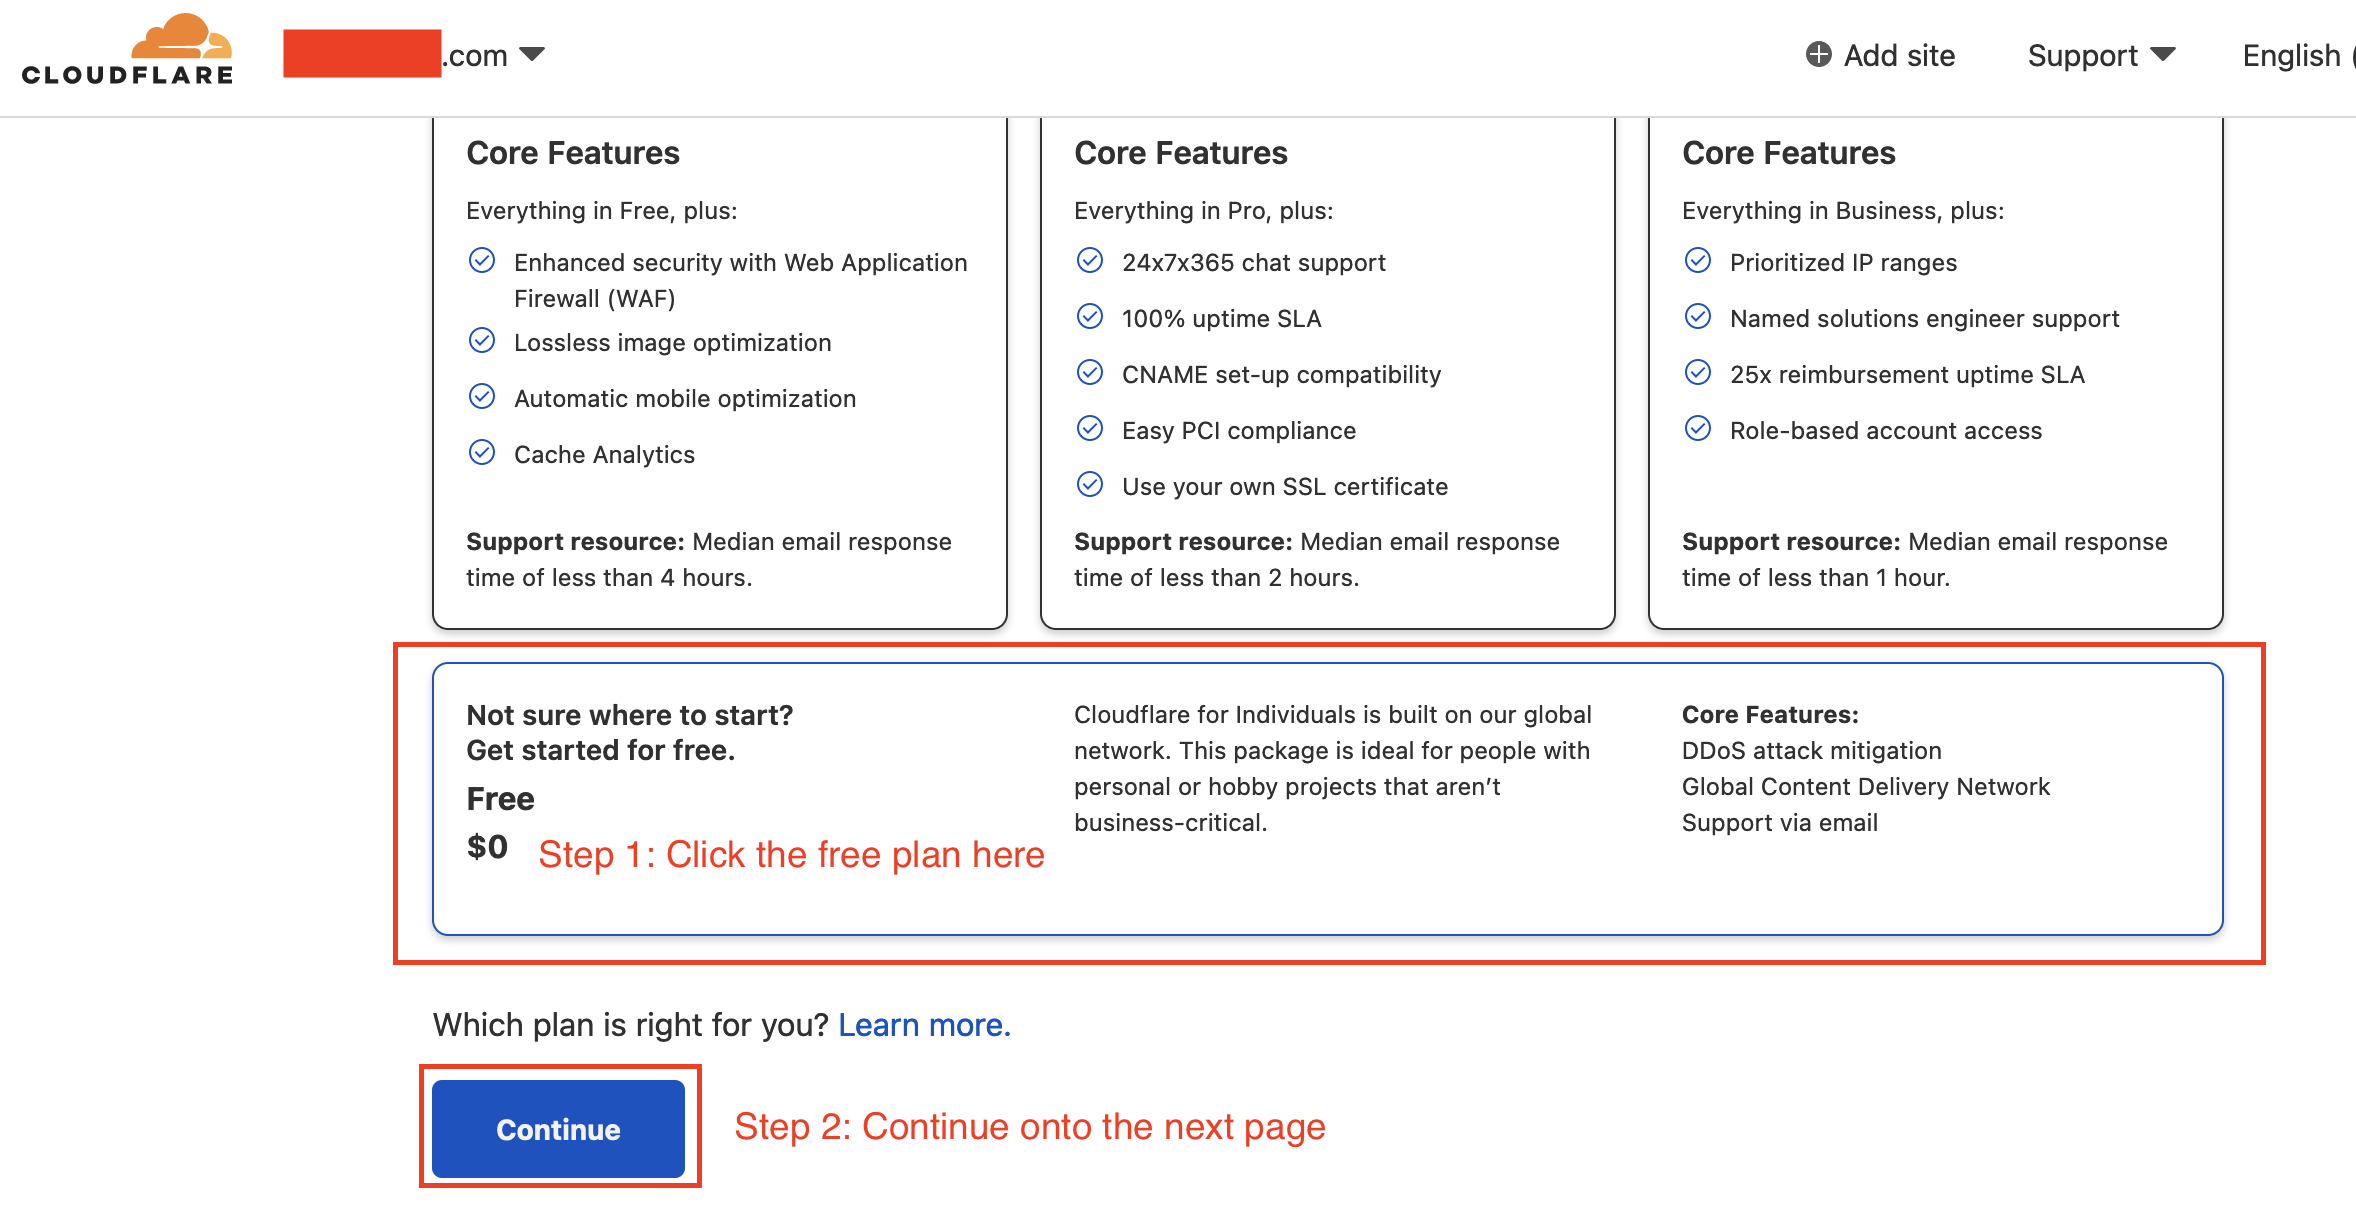
Select a billing plan for this domain- the free tier is perfectly fine for our needs, so we shouldn’t need any of the paid features here
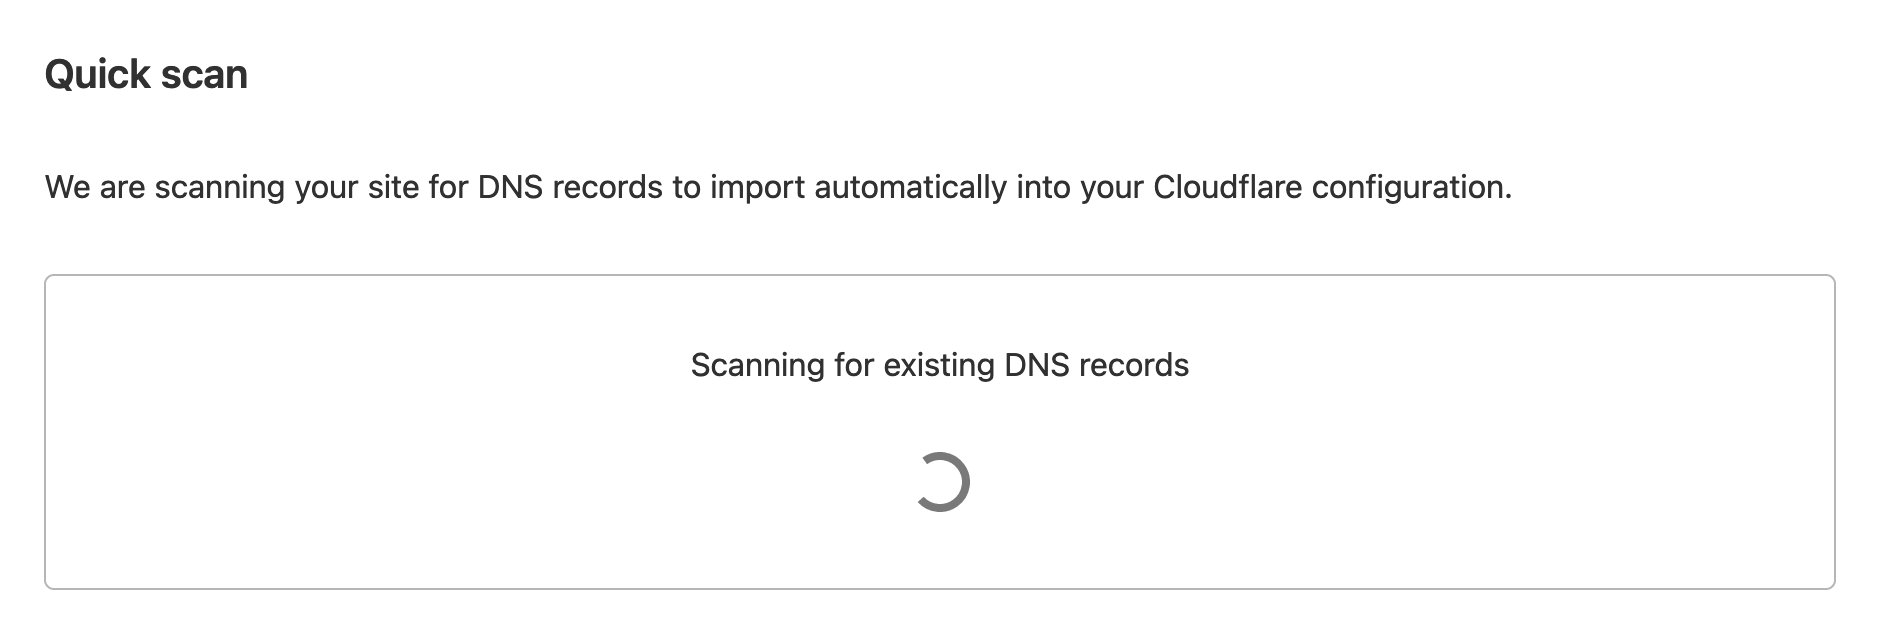
Cloudflare has some nice automatic DNS configuration backend work, which should take the heavy-lifting from copy/pasting DNS settings from Namecheap
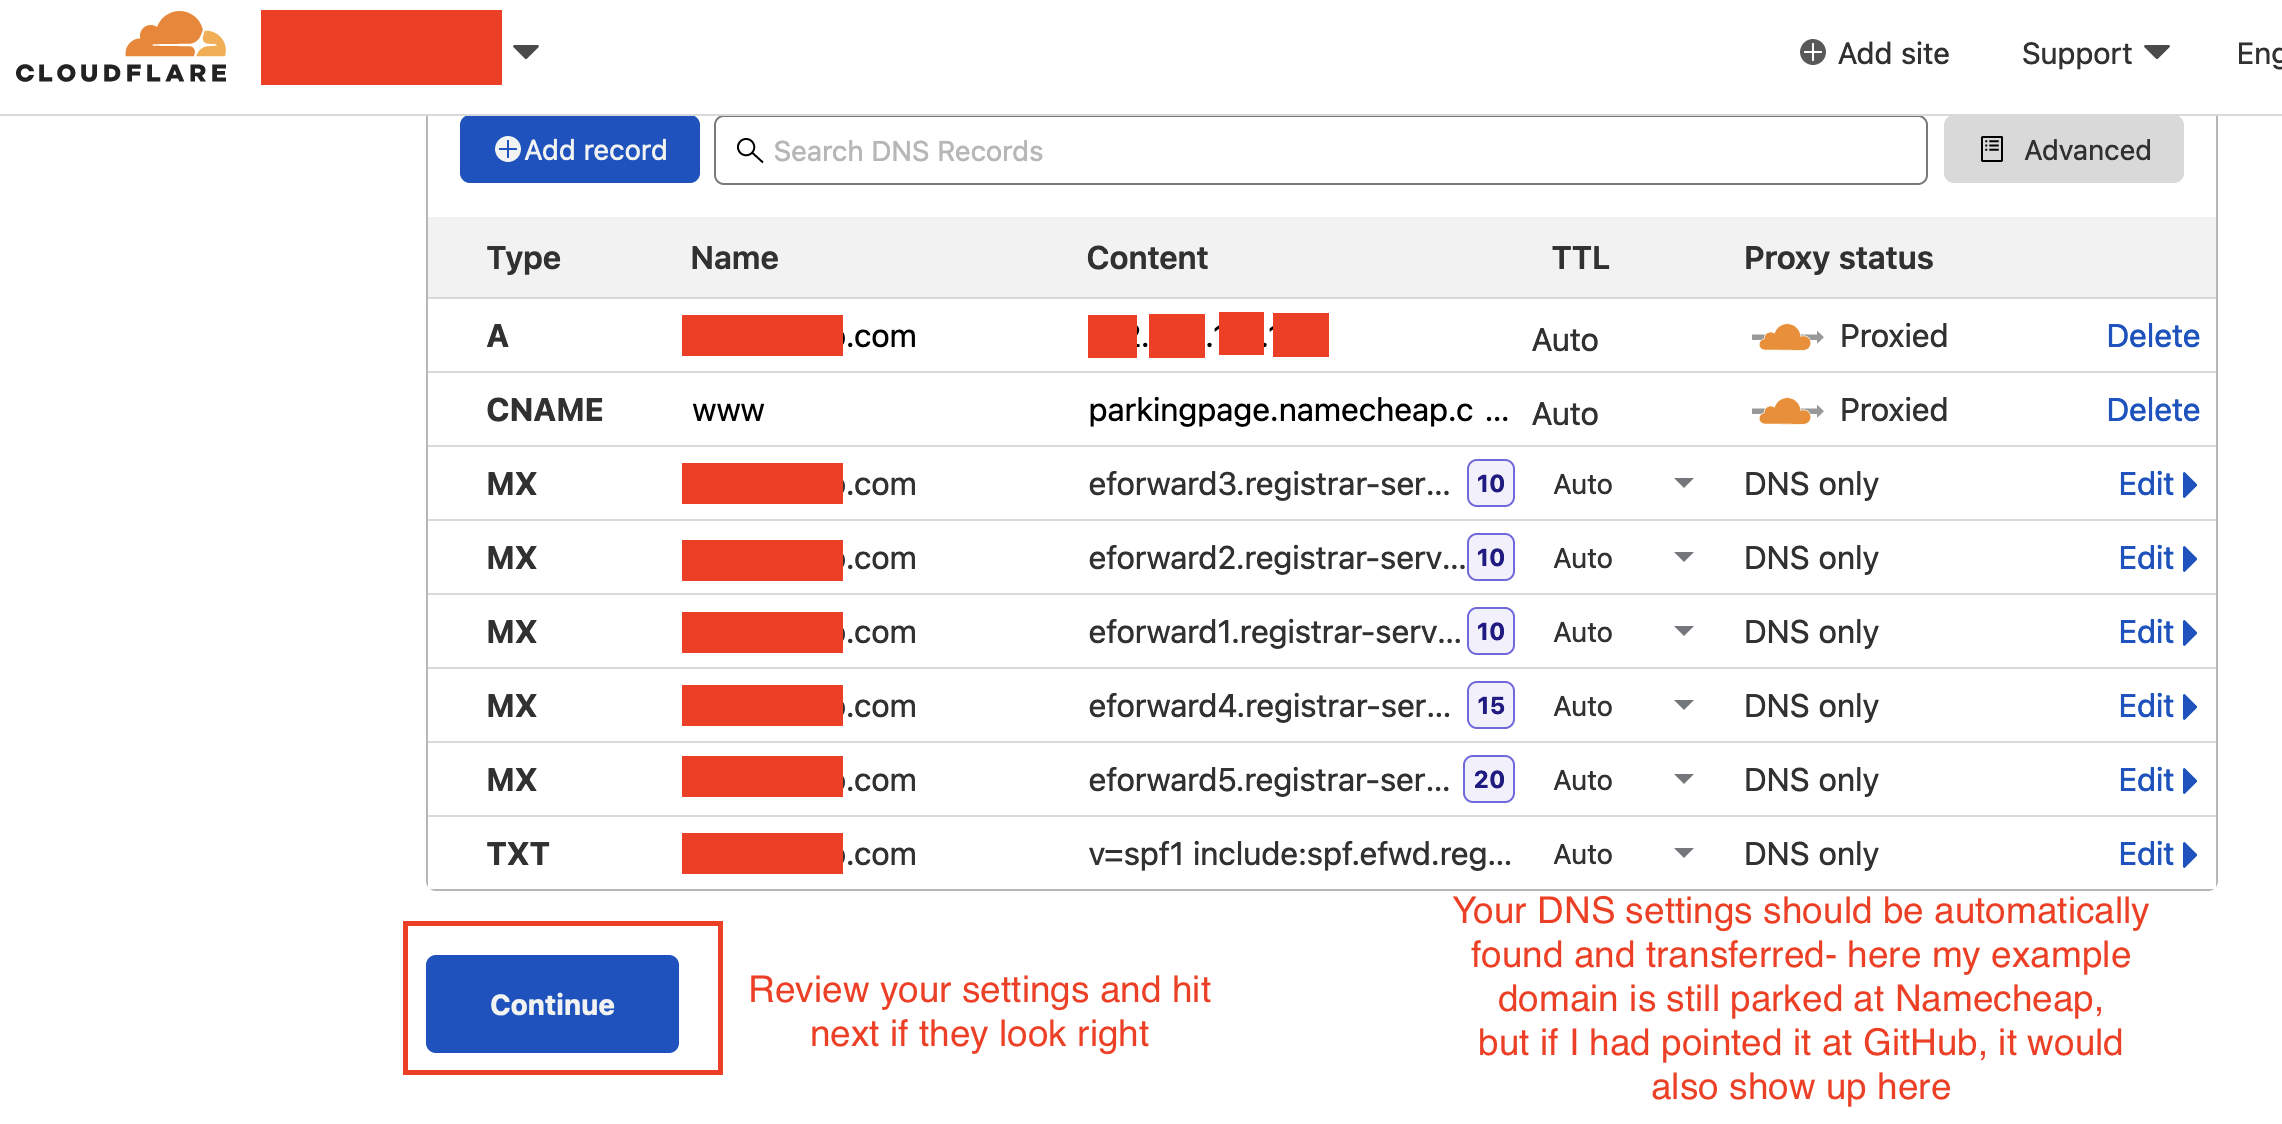
You should now be able to review and confirm your DNS settings- generally you wouldn’t need to change anything since those settings are the same as what you have currently
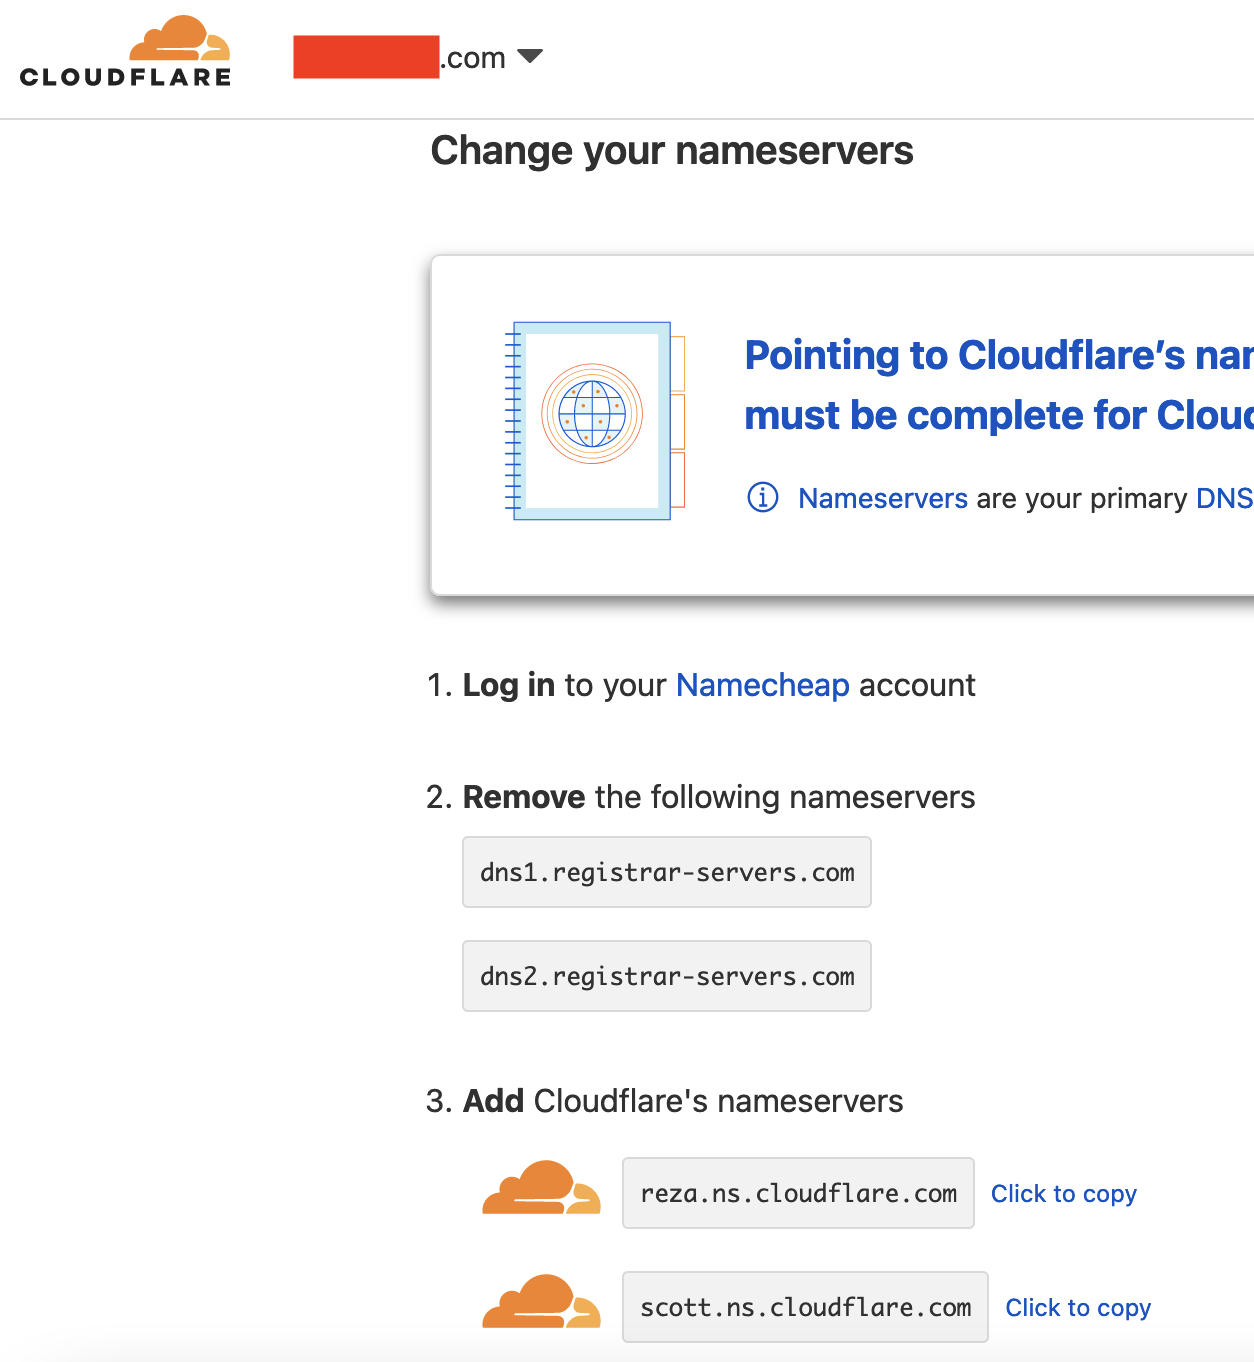
Finally, we’ll need to confirm our control of the domain name by pointing its nameservers to Cloudflare. This page shows what you need to do, but I’ve included a step-by-step just in case here.
Head on over to Namecheap by going to:
https://ap.www.namecheap.com/domains/domaincontrolpanel/<YOUR_DOMAIN_NAME_HERE>/domainand scroll down a bit to the
Nameserversection for your domain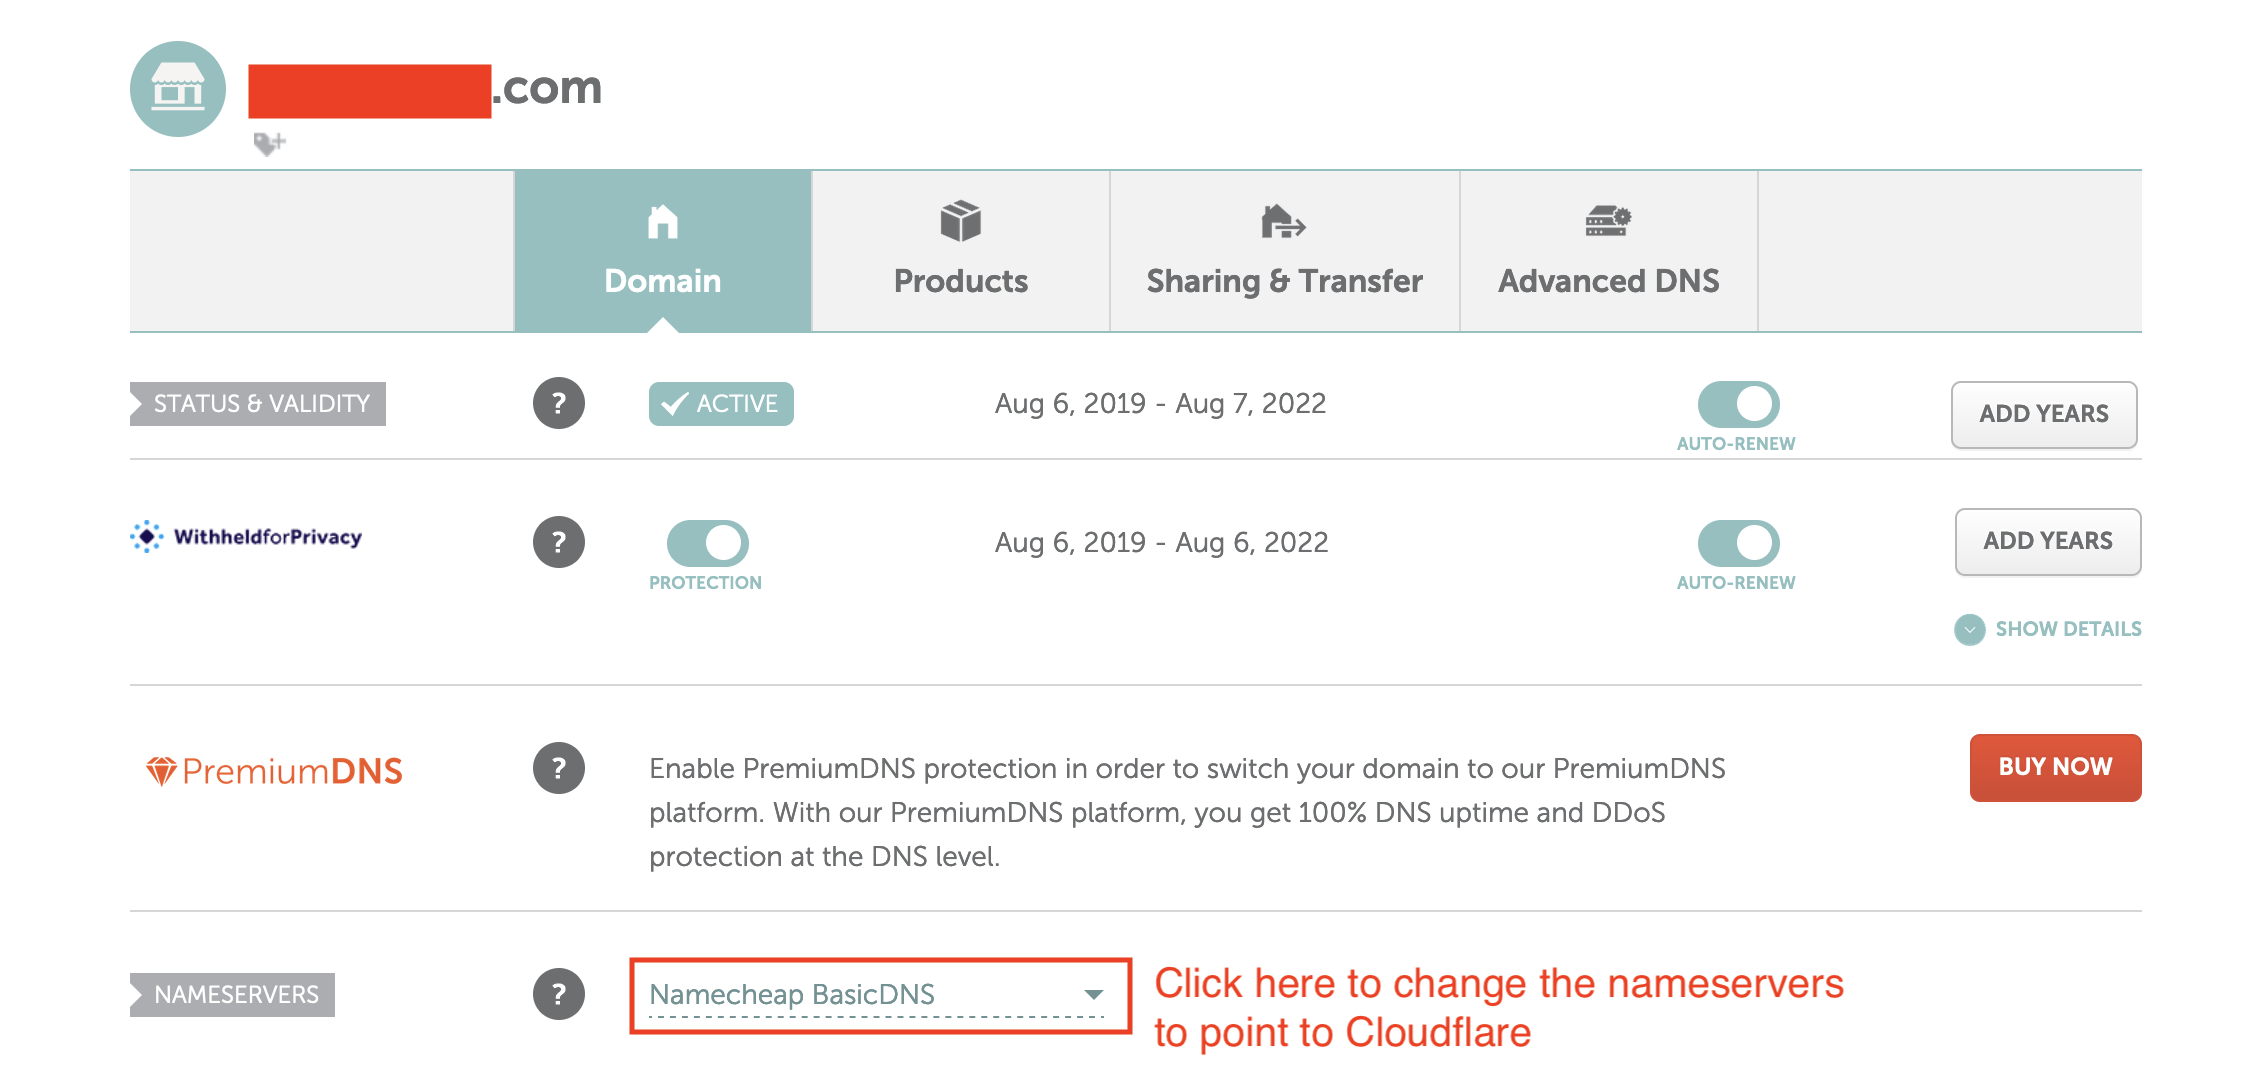
Change your nameservers to point to Cloudflare’s nameservers
reza.ns.cloudflare.comscott.ns.cloudflare.com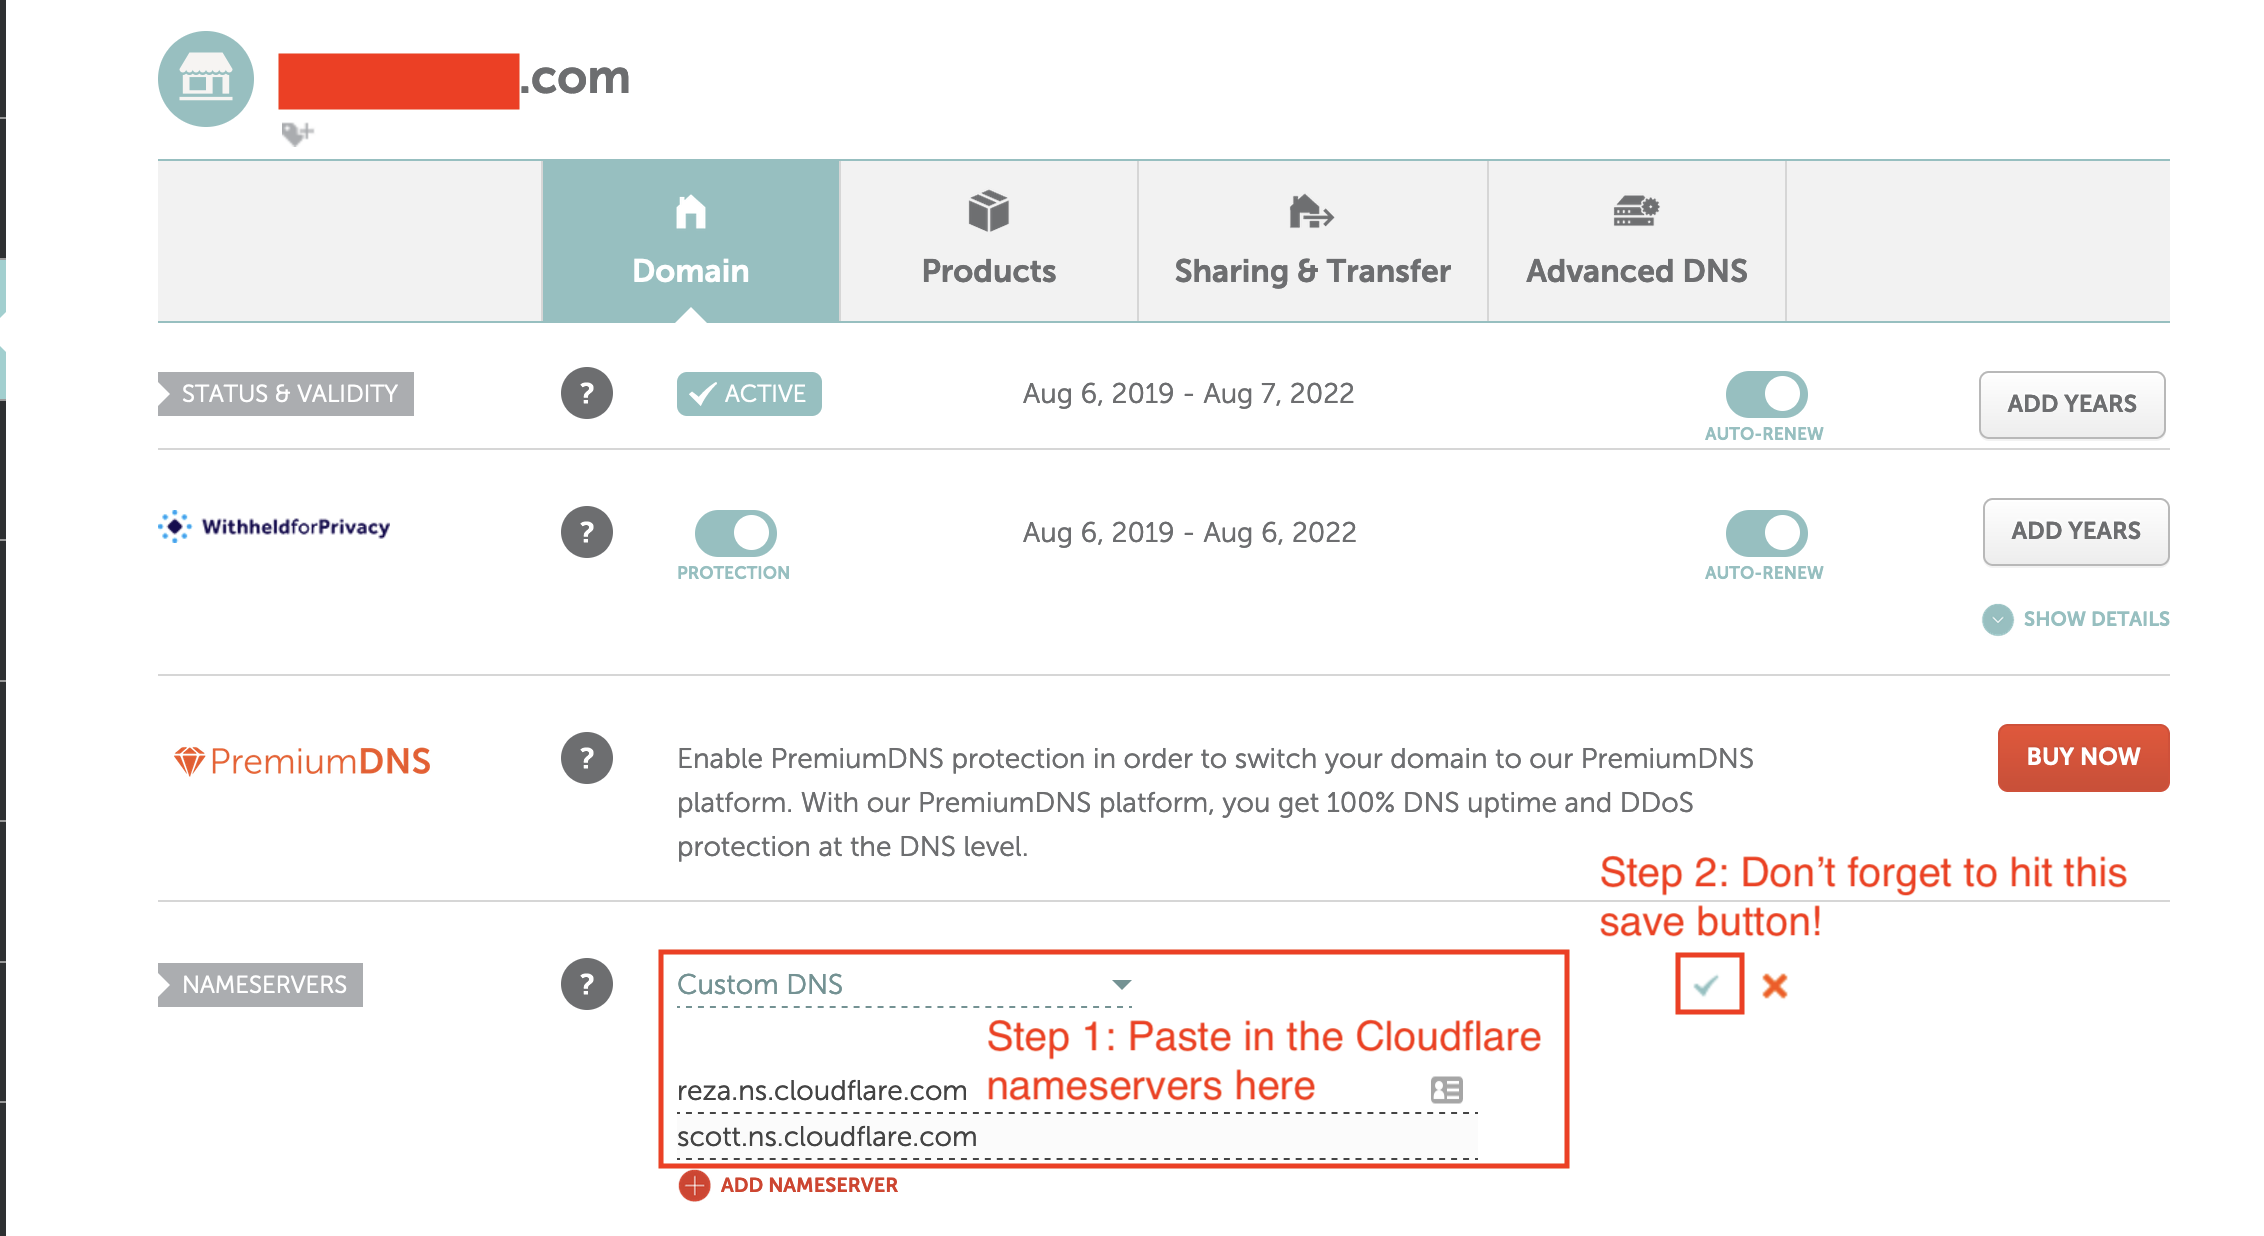
And that’s it! Head back over to the Cloudflare informational page, and hit the
Done, check nameserversbutton for Cloudflare to check and see if the changes have propagated out correctly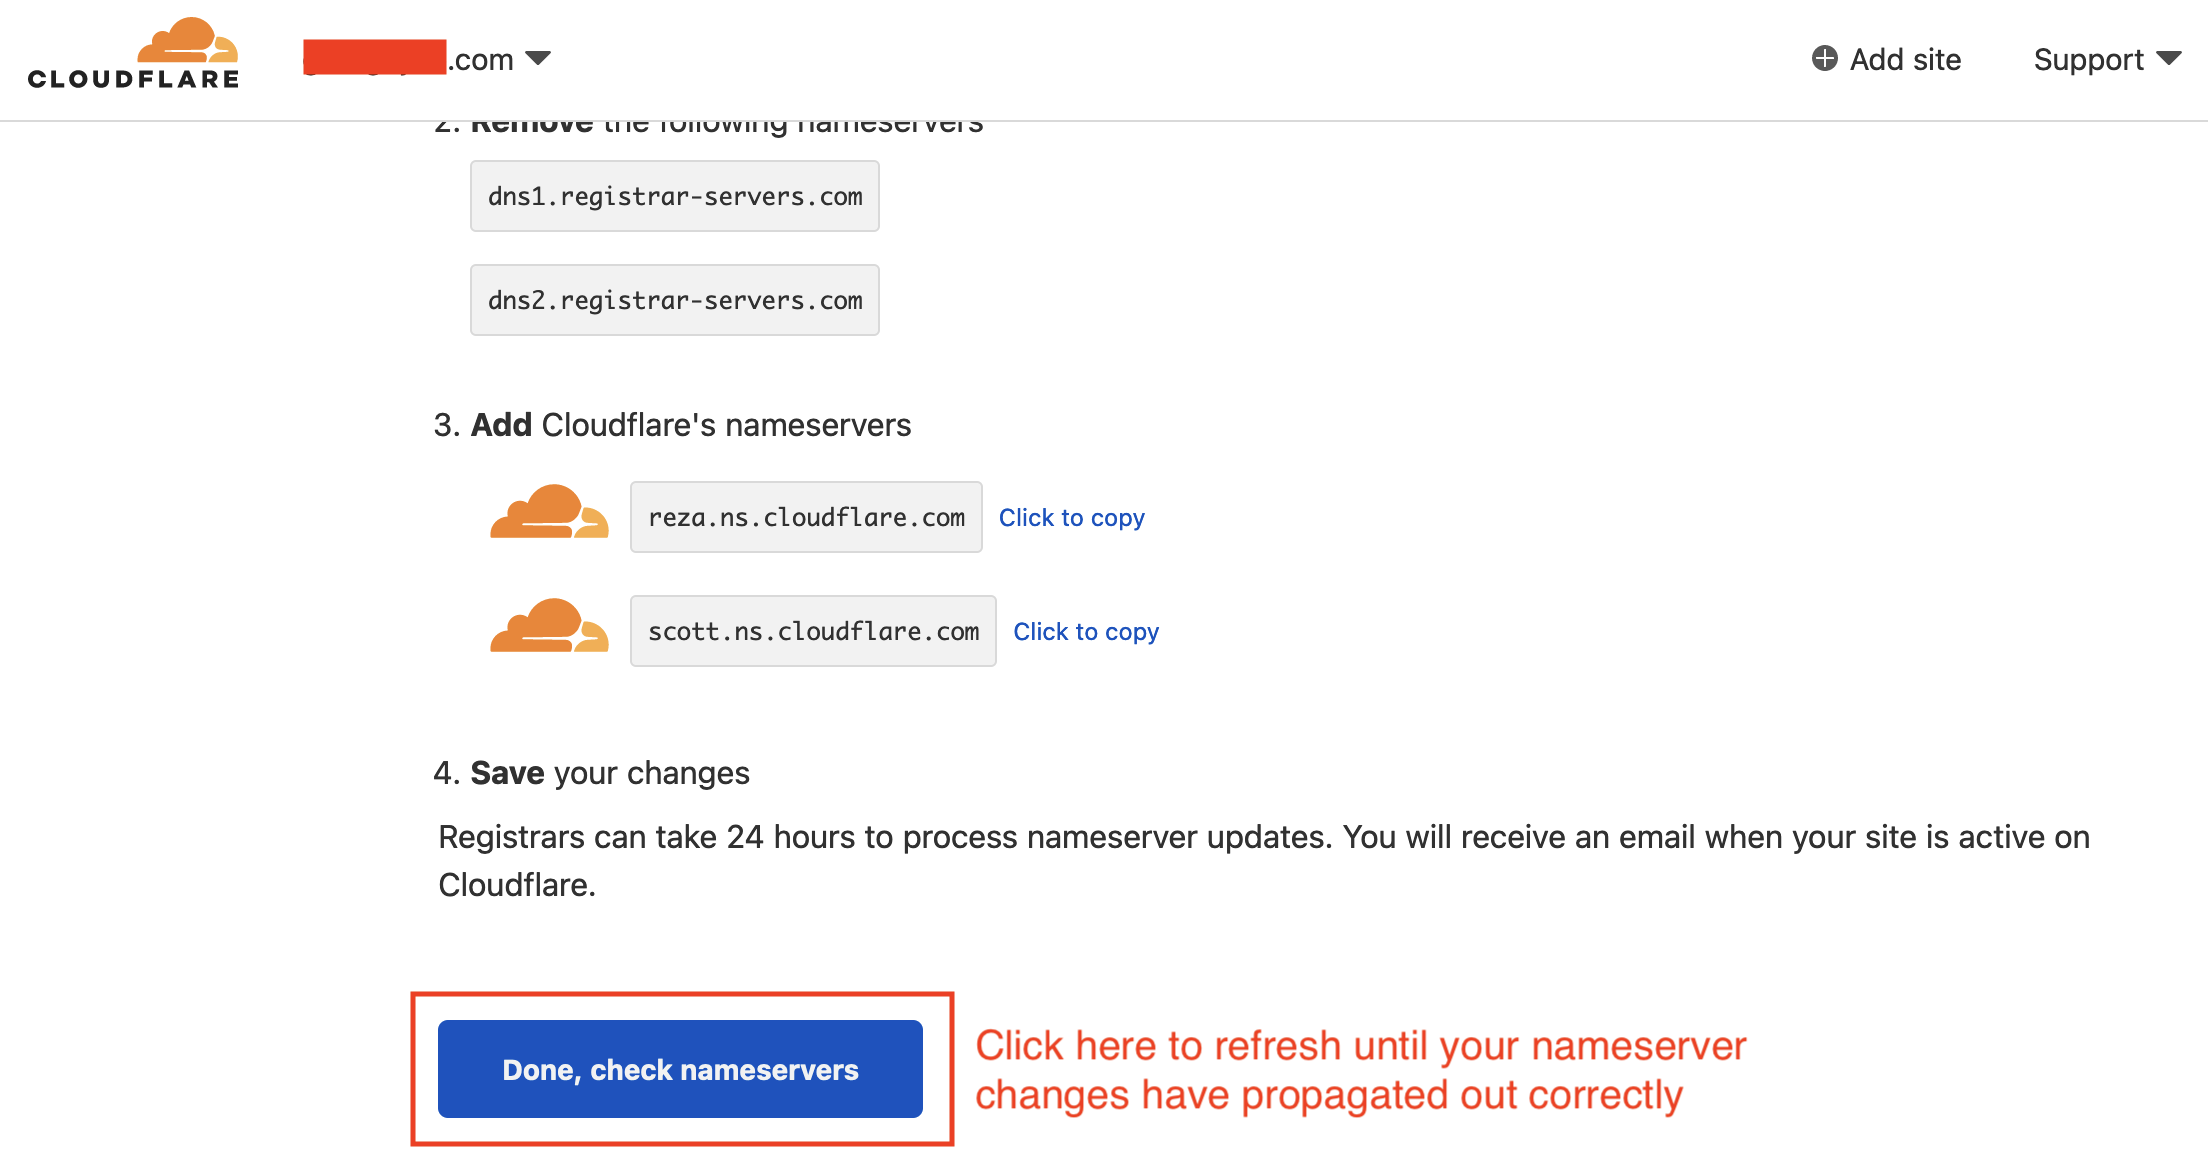
In conclusion
Hopefully this article goes into enough depth so others can see how they too can build a lazy, cheap, and robust solution without having to break the bank.